Tuesday, June 12, 2012
Creamy Cucumber & Dill Salad
When I served this salad with dinner the other day, Roi actually asked if there was any more left for him to eat. To give you an accurate idea of the enormity of this situation--he always eats his salads without complaint, but unless they contain bacon, he never asks for more. And luckily, our cucumber plant is flowering like crazy right now, so we just might be eating this salad all summer long. This recipe is Scandinavian in origin (it's actually called Krämig Dill-Och Gurksallad) and is adapted from the Best International Recipe cookbook.
Creamy Cucumber & Dill Salad
serves 4
3 medium cucumbers, peeled, halved, seeded and sliced 1/4 inch thick
1/3 cup chopped green onions
1 cup sour cream
1/4 cup minced fresh dill
3 tablespoons cider vinegar
1 teaspoon sugar
salt and pepper
1. Whisk the sour cream, dill, vinegar, sugar, and 1/2 teaspoon pepper together in a medium bowl. Add the cucumbers and green onions and toss to coat. Refrigerate the salad until chilled, at least 1 hour, or up to 6 hours. Season with salt and pepper before serving.
Sunday, June 10, 2012
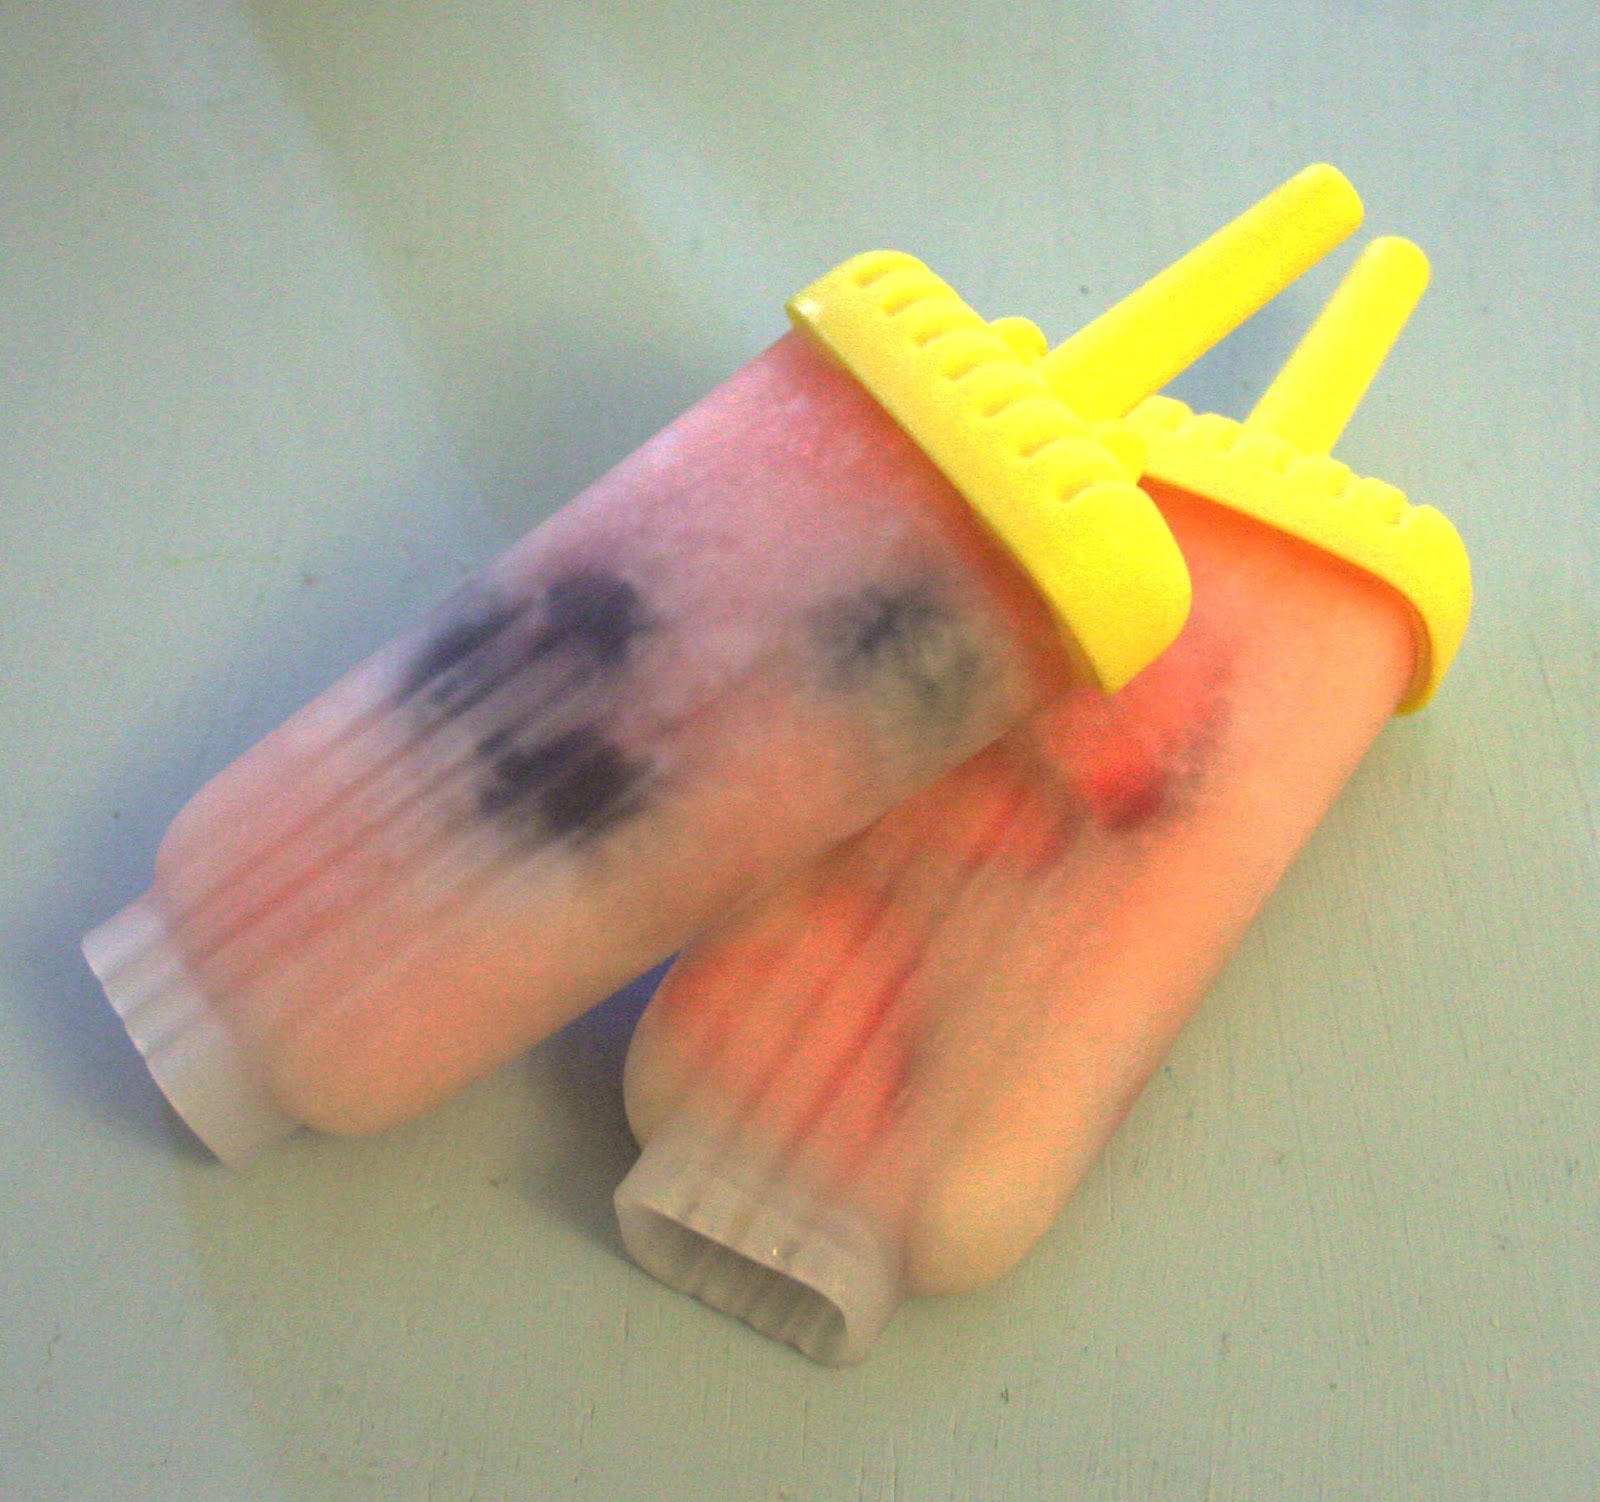
Berry Limeade Poppies
Now for something a bit more fitting for the season. I made these popsicles the other day with ingredients that I had available and they're awesome. I have to confess, I'm eating one as I type this (more difficult than I imagined it to be) so that I can accurately describe how tasty this flavor combination is: refreshing lime, a hint of syrupy cream soda and sweet berries. These poppies are simple to make and the perfect thing on a hot day.
I had 1/2 a bottle of extremely flat cream soda left over from my bday party a few weeks ago (we don't really drink soda at our house, here it's mostly water and cranberry juice) and I don't like to be wasteful, so I wanted to find a use for it.
There isn't really a real recipe for these, everything is interchangeable. I started by putting some of the fruit in the molds; I did 1/2 of the popsicles with sliced strawberries and 1/2 with whole blackberries. Then I combined 1 cup of limeade (we buy the Simply brand, it's not made from concentrate and safely starch-free) and 1 cup of cream soda together and pour them into the popsicle molds. I didn't mix in any extra sugar, and these turned out to be sweet, but not too sweet. Just really refreshing.
Thursday, June 7, 2012
French Onion Soup
Okay, I know what you're thinking. Summer just hit and soup is the last thing you want to make, that all it will do is heat up your kitchen and make you feel miserable. Maybe. But French onion soup isn't just any soup, and this isn't just any recipe for onion soup. I've made at least 4 different versions of French onion soup so far in my life, and this one is by far the best. (You get a little obsessed with finding the perfect recipe for French onion soup when you've been to France and had the perfect French onion soup.) And once you make it, you'll want to eat 3 bowls in a row, it's that flavorful.
French Onion Soup (Soupe à l’Oignon)
Adapted from Smitten Kitchen, in turn adapted from Mastering the Art of French Cooking
1 1/2 pounds (24 ounces or about 5 cups) thinly sliced yellow onions
3 tablespoons unsalted butter
1 tablespoon olive oil
1 teaspoon table salt, plus additional to taste
3 tablespoons almond meal
2 quarts (8 cups) chicken or beef broth (make sure when buying broth that it doesn't have pureed carrots or tomato paste in it, because those are both starchy, making your own is the best way to go)
1/2 cup dry white wine
Freshly ground black pepper
1. Melt the butter and oil together in the bottom of a 4-5 quart saucepan or Dutch oven over moderately low heat. Add the onions, toss to coat them in oil and cover the pot. Reduce the heat to real low and let them slowly steep for 15 minutes. They don’t need your attention for this part.
2. After 15 minutes, uncover the pot, raise the heat slightly and stir in the salt. Cook onions, stirring frequently, for 30 minutes until they have turned an even, deep golden brown. You want them to be browned, but not super caramelized, because caramelizing them makes the onions starchy. This step will build the complex and intense flavor base that will carry the rest of the soup, so don't cut it too short.
![]() |
| {browning the onions} |
3. After the onions are browned, sprinkle them with almond meal and cook, stirring, for 3 minutes. Add the wine in full, then stock, a little at a time, stirring between additions. Season to taste with salt and pepper. Bring to a simmer and simmer partially covered for 30 to 40 more minutes, skimming if needed. Correct seasonings if needed.
![]() |
| {finished soup--I know it's not much to look at, but it tastes amazing} |
4. Preheat oven to 325. Arrange six ovenproof soup bowls or crocks on a large, foil-lined baking sheet. Bring the soup back to a boil and divide among six bowls. To each bowl, add 1/2 teaspoon grated raw onion and a tablespoon of grated cheese. Stir to combine. Dab your bread with a tiny bit of butter and float a few on top of your soup bowls, attempting to cover it. Mound grated cheese on top of it; how much you use will be up to you,but if you love cheese, you could use as much as 1/4 cup per bowl.
![]() |
| {in the oven} |
5. Bake soups on tray for 10 minutes, then preheat broiler. Finish for a minute or two under the broiler to brown the top lightly. Make sure that you use pot holders (because those bowls are going to be scalding) and serve immediately
![]() |
| {finished!} |
French Onion Soup (Soupe à l’Oignon)
Adapted from Smitten Kitchen, in turn adapted from Mastering the Art of French Cooking
1 1/2 pounds (24 ounces or about 5 cups) thinly sliced yellow onions
3 tablespoons unsalted butter
1 tablespoon olive oil
1 teaspoon table salt, plus additional to taste
3 tablespoons almond meal
2 quarts (8 cups) chicken or beef broth (make sure when buying broth that it doesn't have pureed carrots or tomato paste in it, because those are both starchy, making your own is the best way to go)
1/2 cup dry white wine
Freshly ground black pepper
Gratinée (Optional)
1 tablespoon grated raw onion/raw green onion
1 to 2 cups (to taste) grated Swiss, or a mixture of Swiss and Parmesan cheese
1 tablespoon butter, melted
12 to 16 1-inch thick slices of starch free pumpernickel bread (see this post), toasted
1. Melt the butter and oil together in the bottom of a 4-5 quart saucepan or Dutch oven over moderately low heat. Add the onions, toss to coat them in oil and cover the pot. Reduce the heat to real low and let them slowly steep for 15 minutes. They don’t need your attention for this part.
2. After 15 minutes, uncover the pot, raise the heat slightly and stir in the salt. Cook onions, stirring frequently, for 30 minutes until they have turned an even, deep golden brown. You want them to be browned, but not super caramelized, because caramelizing them makes the onions starchy. This step will build the complex and intense flavor base that will carry the rest of the soup, so don't cut it too short.
3. After the onions are browned, sprinkle them with almond meal and cook, stirring, for 3 minutes. Add the wine in full, then stock, a little at a time, stirring between additions. Season to taste with salt and pepper. Bring to a simmer and simmer partially covered for 30 to 40 more minutes, skimming if needed. Correct seasonings if needed.
The soup is so good on it's own , it's not necessary to do the graitinéed top. But sometimes it's nice to be fancy.
4. Preheat oven to 325. Arrange six ovenproof soup bowls or crocks on a large, foil-lined baking sheet. Bring the soup back to a boil and divide among six bowls. To each bowl, add 1/2 teaspoon grated raw onion and a tablespoon of grated cheese. Stir to combine. Dab your bread with a tiny bit of butter and float a few on top of your soup bowls, attempting to cover it. Mound grated cheese on top of it; how much you use will be up to you,but if you love cheese, you could use as much as 1/4 cup per bowl.
5. Bake soups on tray for 10 minutes, then preheat broiler. Finish for a minute or two under the broiler to brown the top lightly. Make sure that you use pot holders (because those bowls are going to be scalding) and serve immediately
Wednesday, June 6, 2012
"Pumpernickel" Bread
Pumpernickel Bread
makes 1 loaf
1/3 cup butter
1 teaspoon sugar (or honey)
Finding
the recipe for this bread has proven to be an amazing breakthrough for
us in terms of providing options for bread and bread-like products that
the Hubs can eat. It provides a nice baseline off of which you can base
other bread-y recipes. This bread is probably much more dense than any
other bread that you're used to, so you'll probably want to slice it
pretty thin. But it's remarkably versatile (as you will see in some of
my upcoming recipe posts) and has a rich, nutty taste and texture. It
also only takes a few minutes to whip up. This recipe is adapted from
the Pumpernickel Bread recipe in the Healing Foods cookbook.
| {mixing the dough} |
![]() |
{in the pan, before baking}
|
makes 1 loaf
1 cup walnuts
4 cups almond flour (we buy our almond meal from Trader Joe's)
1/2 teaspoon salt
1 teaspoon baking soda
3 eggs1/3 cup butter
1 teaspoon sugar (or honey)
1. Preheat the oven to 300 degrees and line a 4x8 inch loaf pan with baking paper. Put walnuts into a food processor and blend for 10 seconds. Add almond flour, salt and baking soda and mix. In another bowl, whisk the eggs, butter and sugar/honey until fluffy. Pour into the food processor and process with the almond flour until the dough is well combined. The dough will be thick and heavy. Pour the dough into the lined loaf pan and bake for 50-60 minutes or until the top is browned and cracked. The bread will sound hollow and will be quite firm to the touch.
2. Remove from the oven and cool for 10 minutes. Remove from pan and peel off baking paper. Refrigerate bread in an airtight container; it will keep for 1 week.
Tuesday, June 5, 2012
Vaca Frita (Cuban Stir-Fried Beef)
![]() | |||
| {vaca frita + roasted cauliflower} |
| {boiling the meat} |
| {shredded beef, pre-stir frying} |
| {stir-frying} |
Vaca Frita
makes 4-6 servings
one 2 1/2 lb. flank steak, cut into 1/3s
1 bay leaf
1/4 cup fresh lime juice
1/4 cup fresh lemon juice
3 cloves garlic, minced
salt & pepper to taste
1/2 cup olive oil
1 large onion, cut in 1/2 and each 1/2 thinly sliced
2 tablespoons finely chopped fresh cilantro
1. Put the beef and bay leaf in a large saucepan, cover with salted water, and cook over low heat, covered, until the meat is tender, 1-1 1/2 hours. Then remove the meat from the stock and allow to cool at room temperature. When the meat is cool, cut it into 2-inch chunks, shred it using your fingers, and place in a large nonreactive bowl. Add the citrus juices, garlic, salt, and pepper, cover, and refrigerate at least 1 hour, or overnight.
2. Remove the meat from the marinade and squeeze out the excess liquid. In a large skillet, heat the oil over medium-high heat until fragrant and cook the onions, stirring, 5-6 minutes. Add the beef shreds and cook, stirring, 10 minutes more, until the beef is crisp. Sprinkle with cilantro.
Sometimes, depending on what I have around, I'll also add in a little orange juice or sherry when I'm stir-frying, they both add really nice flavor to the dish.
Sunday, June 3, 2012
Double Chocolate Ice Cream
If you ask Roi what his favorite dessert is that I make for us at home, he'll always say chocolate ice cream. I think he could probably eat a quart a day. And I love this recipe because it doesn't require an ice cream maker to yield amazingly creamy, rich and delicious ice cream, which is lucky, because we don't yet own an ice cream maker.
This ice cream takes less than 10 minutes to make (if you don't count freeze time), but it's super rich, so some people might like to cut it with vanilla ice cream. Roi says you can have half of this chocolate ice cream and half vanilla ice cream and it'll be the same chocolatey-ness as store-bought chocolate ice cream. I found this recipe in Cook's Country magazine. [Also, please excuse the instagram phone photos, with my computer broken, my photo options are a little more limited and I like to play around with photo apps on my phone.]
Double Chocolate Ice Cream
makes 1 quart
1 teaspoon instant coffee or espresso powder
1 tablespoon hot water
4 ounces bittersweet chocolate, chopped fine (I usually just make it with semisweet chocolate chips, though)
1/2 cup sweetened condensed milk
1/2 teaspoon vanilla extract
pinch salt
1 1/4 cups cold heavy cream
![]() | ||
| {measuring out my chocolate} |
![]() |
| {post-melting} |
1. Combine coffee/espresso powder and hot water in a small bowl. Let stand until coffee dissolves, about 5 minutes. Microwave chocolate, sweetened condensed milk, and coffee mixture in bowl, stirring every 15 seconds, until the chocolate is melted, about 1 minute. Stir in vanilla and salt, then let cool.
![]() | ||
| {whipping the cream} |
![]() |
| {folding it all together} |
2. With an electric mixer on medium-high speed, whip cream to soft peaks, about 2 minutes. Whisk 1/3 of whipped cream into chocolate mixture. Fold remaining whipped cream into chocolate mixture until incorporated. Freeze in airtight container until firm, at least 6 hours or up to 2 weeks.
![]() |
| {my cooking helper! Peppy was sitting next to me while I was making the ice cream} |
Double Chocolate Ice Cream
makes 1 quart
1 teaspoon instant coffee or espresso powder
1 tablespoon hot water
4 ounces bittersweet chocolate, chopped fine (I usually just make it with semisweet chocolate chips, though)
1/2 cup sweetened condensed milk
1/2 teaspoon vanilla extract
pinch salt
1 1/4 cups cold heavy cream
1. Combine coffee/espresso powder and hot water in a small bowl. Let stand until coffee dissolves, about 5 minutes. Microwave chocolate, sweetened condensed milk, and coffee mixture in bowl, stirring every 15 seconds, until the chocolate is melted, about 1 minute. Stir in vanilla and salt, then let cool.
2. With an electric mixer on medium-high speed, whip cream to soft peaks, about 2 minutes. Whisk 1/3 of whipped cream into chocolate mixture. Fold remaining whipped cream into chocolate mixture until incorporated. Freeze in airtight container until firm, at least 6 hours or up to 2 weeks.
Lemon Curd/Lemon Custard Icing
Lemon curd has actually been a very large bone of contention in our household. Roi had never heard of lemon curd before I made it and flat out refused to try it because in his book, anything called "curd" sounded disgusting. So I had to come up with a different name to call it (even though fruit curds are not a new thing--we use lemon curd and passion fruit curd at the bakery where I work on a regular basis) before he'd even consider tasting it. So now at home lemon curd is now lemon custard icing.
Anyway, lemon curd is delicious and definitely something you should try if you haven't before. And making it from scratch is way better than buying it pre-made from the store. You can use it as filling in a layer cake, as an ice cream topper, on pancakes, with muffins, etc. After I made it, I kept trying to think of more things to eat it with, because I just wanted more. I followed this recipe.
![]() | ||
| {all the supplies, sans salt} |
makes ~2 1/2 cups
3 lemons
1 1/2 cups sugar
1 cup butter
4 eggs
1/2 cup lemon juice
pinch salt
![]() | |
| {lemon & sugar} |
1. Peel the lemons with a vegetable peeler. Add the zest to the bowl of the food processor or blender. Blend until the sugar is very finely minced. The oils from the lemons will come out and flavor the sugar. Add the butter to the food processor. Then add the cream until it comes together. Add the eggs one at a time, with the machine running. Add the lemon juice and salt. Mix until the mixture is pale yellow.
![]() | |||
| {starting to cook} |
![]() |
| {the spoon test} |
2. Transfer the mixture to a saucepan. Cook over low heat on the stove until it thickens. You will need to stir the whole time, and it'll take about 10 minutes. You will know that it's ready when you dip a wooden spoon (I used a metal spoon, it worked just fine) into the lemon curd, drag your finger across, and if the line stays, it is thick enough. Then proceed to eat it on everything!
![]() |
| {vanilla ice cream with lemon curd & fresh strawberries} |
makes ~2 1/2 cups
3 lemons
1 1/2 cups sugar
1 cup butter
4 eggs
1/2 cup lemon juice
pinch salt
1. Peel the lemons with a vegetable peeler. Add the zest to the bowl of the food processor or blender. Blend until the sugar is very finely minced. The oils from the lemons will come out and flavor the sugar. Add the butter to the food processor. Then add the cream until it comes together. Add the eggs one at a time, with the machine running. Add the lemon juice and salt. Mix until the mixture is pale yellow.
2. Transfer the mixture to a saucepan. Cook over low heat on the stove until it thickens. You will need to stir the whole time, and it'll take about 10 minutes. You will know that it's ready when you dip a wooden spoon (I used a metal spoon, it worked just fine) into the lemon curd, drag your finger across, and if the line stays, it is thick enough. Then proceed to eat it on everything!
Subscribe to:
Posts (Atom)